How to connect Snowflake to Google Sheets
.webp)

Today’s modern data stacks are powered by a dizzying array of tools and technologies. Still, no matter how advanced technology gets, there are some things that never change…
… like the fact that business users prefer to work in operating documents, like spreadsheets.
You can have the most advanced data stack on the planet, but it will never be a replacement for tools like Google Sheets. People know GSheets, they love it, and they aren’t going to give it up for a BI dashboard anytime soon.
That’s why having the ability to move data from your Snowflake to Google Sheets is so useful – it meets people where they already are and allows them to make data-driven decisions using their preferred tools.
There are a few different ways to connect Snowflake to Google Sheets, including:
🟧 The manual, old-fashioned way
🟨 The Python-powered DIY way
🟩 The easy way with AirOps
Let’s review each one in more detail and go over some step-by-step instructions for how to get data from Snowflake to Google Sheets.
Option 1: A manual CSV upload, aka the old-fashioned way 💾
While it’s not the most scalable solution, for single-use and one-off use cases, manually downloading data from Snowflake is an easy way to get it into Google Sheets.
Luckily, the Snowflake console makes it simple to write a query and download the results in CSV format. From there, that CSV can be easily dropped into your G Sheet.
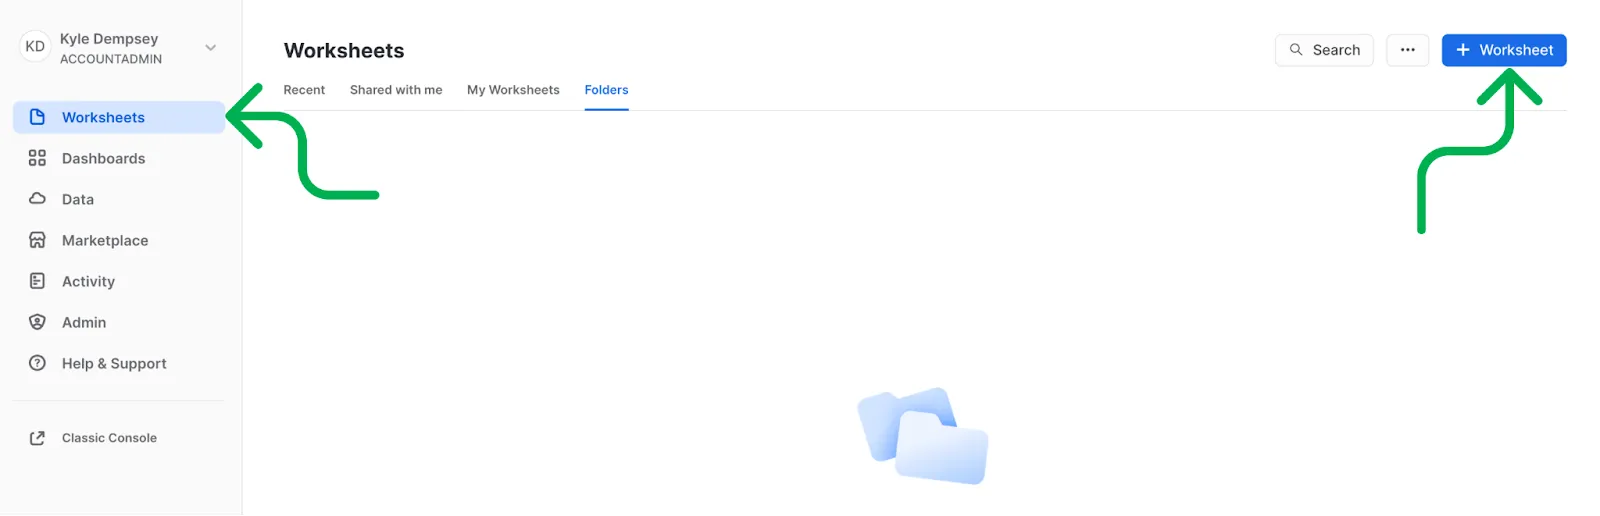
1. Set up a new SQL query in Snowflake
Log into your Snowflake account, select the Worksheets tab, and click + Worksheet to start a new SQL Query.
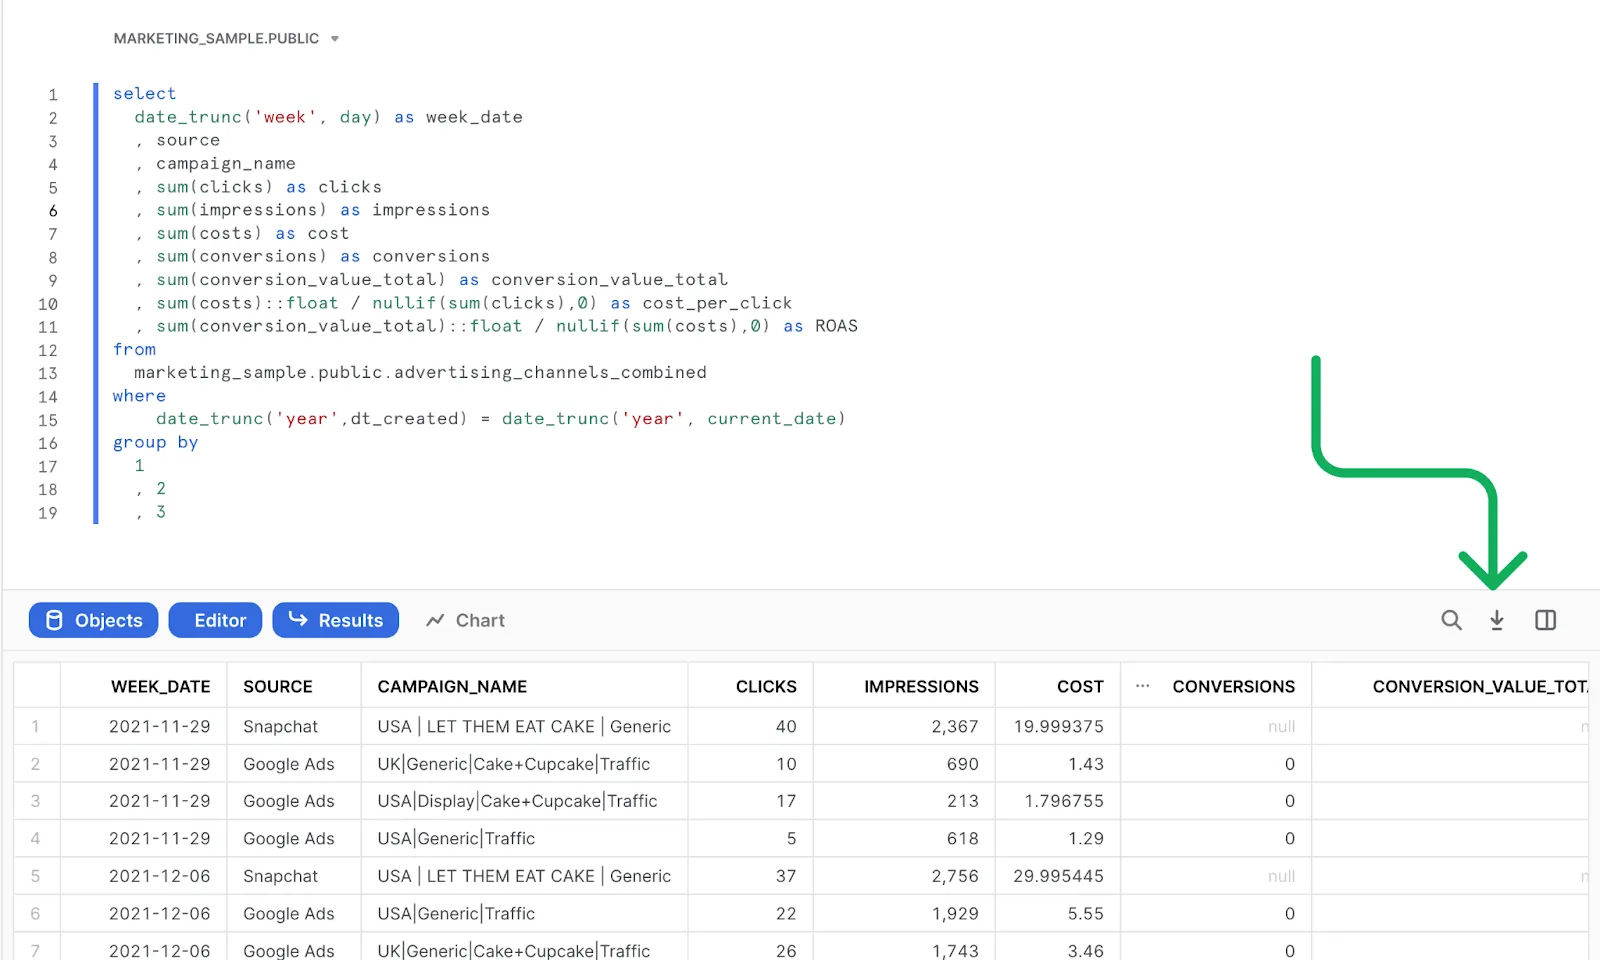
2. Pull data from the table/s.
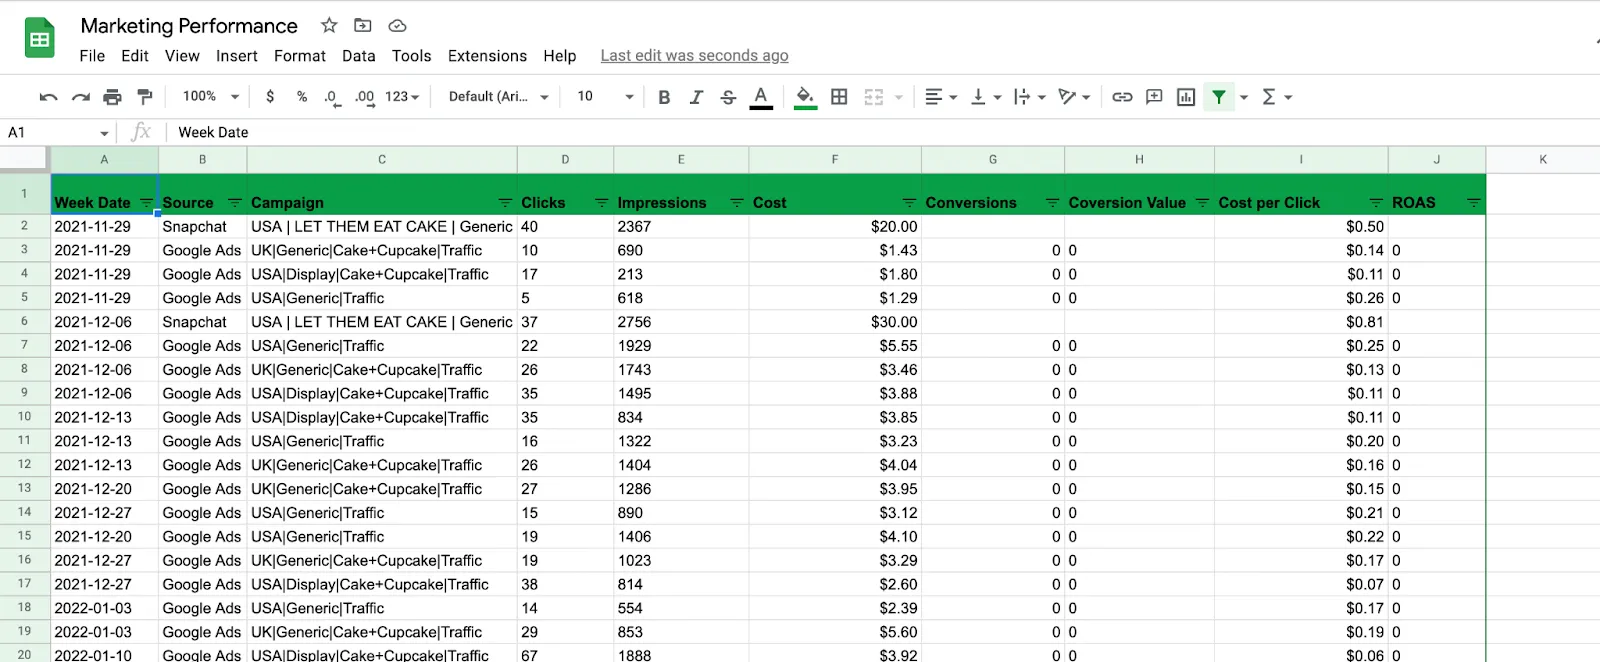
Once inside the worksheet, a SQL query can be used to pull data from the table or tables that are needed for the analysis. This can be a simple “select *” query, or it can be more complex.
It’s generally a good idea to add a “WHERE” clause to the query to limit the total number of rows. This will ensure that the CSV size is not too large to download and upload into Sheets.
In the following example, I’ve put together a simple query to pull my marketing performance metrics (e.g. clicks, impressions, ROAS) group by week, the ad source, and the campaign name.
3. Download the query results
After the query has been successfully run and results are displayed in the Snowflake worksheet, they can be easily downloaded in CSV format by selecting the download button in the top right corner of the result pane.
Warning: this is limited to 100MB of data.
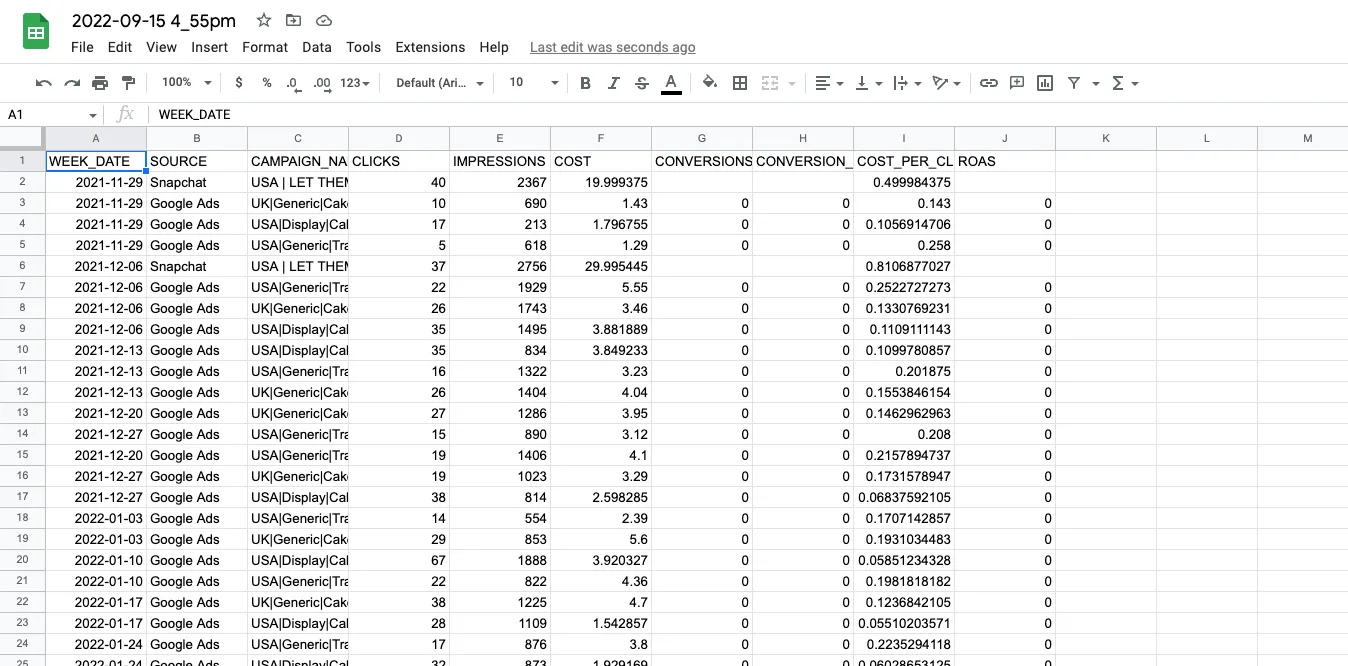
4. Create a new Sheet and upload the CSV.
Once the data is in CSV format, it can be uploaded to Google Sheets by creating a new sheet, selecting file → open → upload. Depending on the file size, the upload may take a few seconds/minutes.
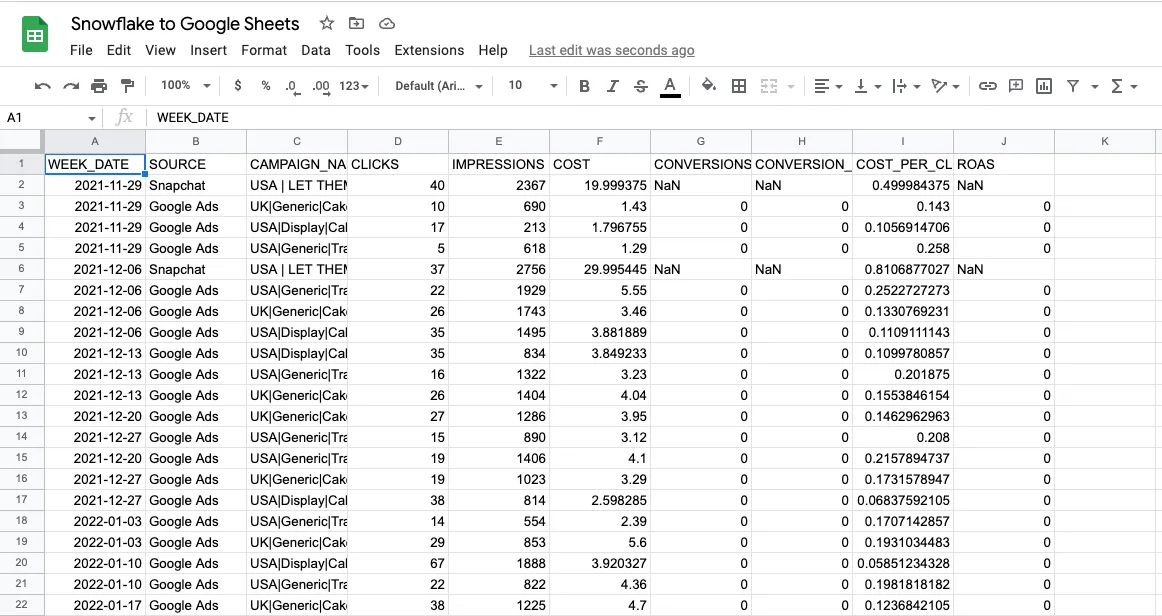
5. You’re done! …for now.
Because this process is one-time-use, if the dataset needs to be updated, the above steps will need to be repeated.
Option 2: The DIY way with a Python script 🛠️
Manual uploads work great for one-off use cases, but if a business process depends on data within Google Sheets, it usually makes more sense to set up a pipeline that automatically refreshes with new data.
There are a number of ways this can be done, but we’ll walk through an example that most data engineers will be familiar with: Python.
1. Install the dependencies needed for your script.
Snowflake makes the process a bit more simple with their Python Connector API. The first step is to set up a python environment and install the snowflake connector following the instructions here.
Tip: to make things easier, make sure to download the pandas compatible version of the snowflake connector.
pip install "snowflake-connector-python[pandas]"
You’ll also need to install a few other libraries before getting started including pandas and pygsheets.
pip install pygsheets
pip install pandas
2. Configure access to your Google account.
Before getting started, the Google Sheet and Google Drive APIs will need to be enabled within your Google Cloud Console.
After the APIs have been enabled, service account credentials can be created under APIs & Services → Credentials → + Create Credentials → Service Account. After the service account is created, a key can be created and downloaded under the service account by selecting Keys → Add Key → JSON. That key can be saved into the same file directory as your Python script.
After setup, a service account address with the following format will be displayed:
Share the target Google Sheets spreadsheet with this account. More information about service accounts can be found here.
3. Write the SQL query, and save it to the same directory as your Python script.
Here we’ve saved the SQL query as query.sql.
4. Begin your python script by importing the libraries that we defined earlier:
5. Pull data from your Snowflake warehouse.
Write functions to read the SQL query from the file that you’ve already saved, connect to the Snowflake warehouse, and then run the query against the Snowflake database and return results into a Pandas Dataframe.
At minimum, the following pieces of information will be needed from your Snowflake environment. Details and additional parameters that can be used through the Snowflake Connection API can be found here.
Next, the three functions can be written to perform the database operations:
Finally, the three functions are run to store the query results in a dataframe df_results:
The first part is now complete! The data has been pulled from the Snowflake database and is ready to be loaded into the Google Sheet.
6. Write the query results to the Google Sheet.
The ID of your GSheet spreadsheet, the ID of the specific worksheet (tab), and the name of the JSON file that was stored into the project directory will be required. The IDs can both be found in the URL of your Google Sheet:
https://docs.google.com/spreadsheets/d/<ID OF YOUR GOOGLE SHEET>/edit#gid=<ID OF THE WORKSHEET>
Define a variable for each piece of information in your script.
Now, a function to write the script can be written. This portion of the script is made much easier through the use of the pygsheets library. More information about the pygsheet library can be found here.
In this example, the Sheet is cleared before being written to. This allows the Sheet to fully replace the previous records on each run.
7. Your script is now complete and ready to run!
After running it, you’ll see your Google Sheet update with fresh data.
Here's the full script:
8. Bonus Round: Schedule your script to run on its own.
There are quite a few ways the Python script can be executed automatically.
If we’re sticking to the DIY approach, a cron job can be written to run the script on whatever time interval is needed. Alternatively, cloud services like AWS Lambda and Google Cloud Functions will host the script within a cloud platform and can execute it as needed.
Finally, data engineering teams with a sophisticated orchestration process may use an orchestration tool like Apache Airflow. This same orchestration process could be used to run the Python script as a part of the data engineering pipeline.
Option 3: AirOps, aka ✨the easy way ✨
If you don’t have the time to load data into your spreadsheet manually, or the patience to put together a Python script, the process can quickly be automated with AirOps.
AirOps makes it fast and simple to load data from Snowflake, or any data warehouse, into operating doc applications like Google Sheets. It also…
❄️ Connects directly to your Snowflake cluster
🔐 Authenticates your Google account
⏱️ Automatically updates your Sheet however often you need it to
Here’s how the process works:
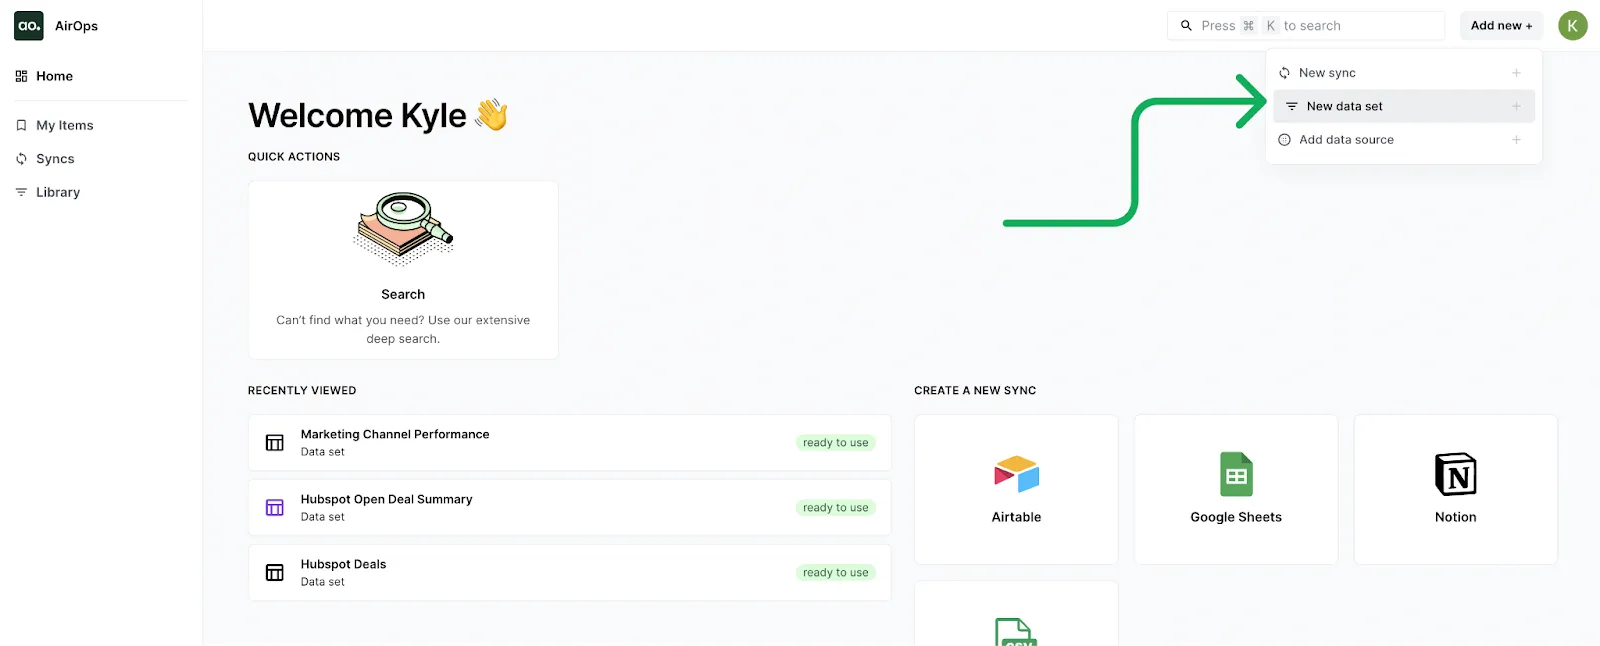
1. Log in and create a new data set.
After logging into AirOps, create a new data set by clicking Add New + → New Data Set.
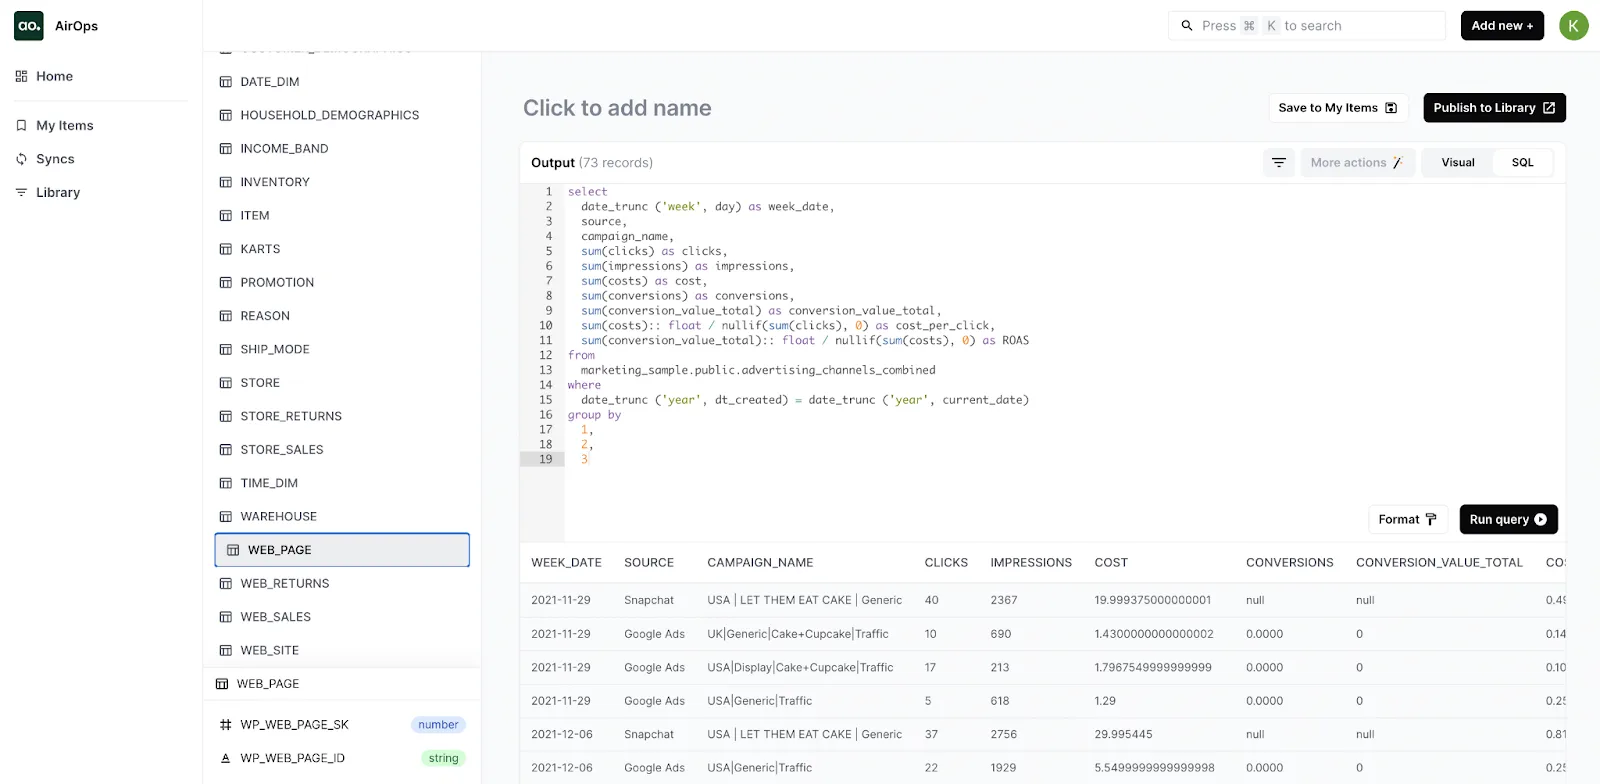
2. Develop your data set, your way.
Develop your data set using the built-in SQL editor, or go code-free by using the Visual Query Builder.
Then, publish it using the Publish to Library button.
SQL Editor:
Visual Query Builder:
💡(Hint: You can switch from Visual to SQL to auto-generate a SQL query.)
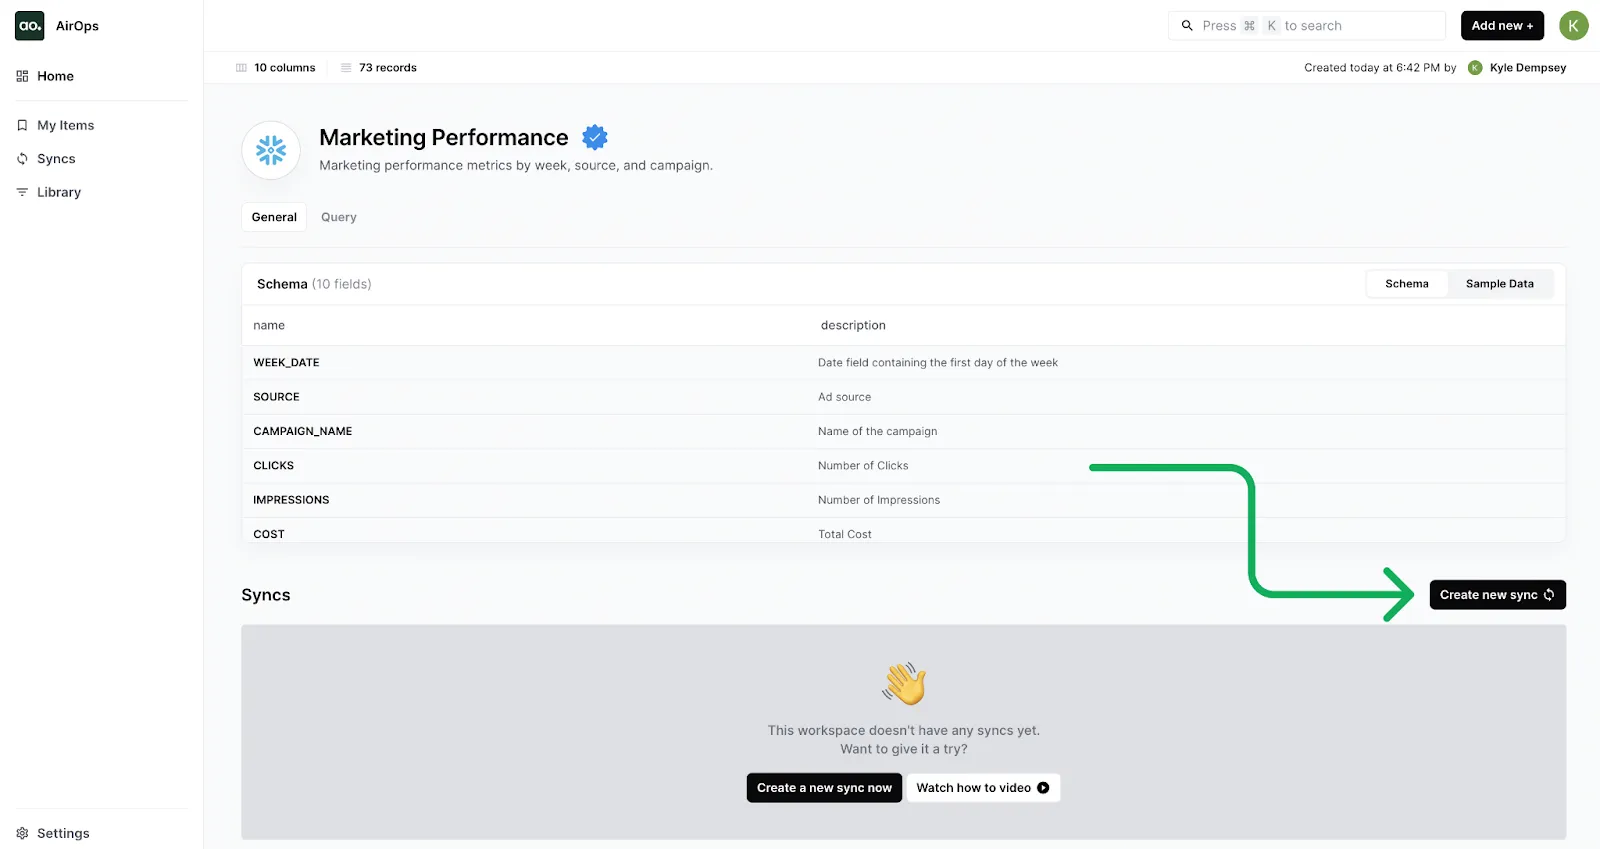
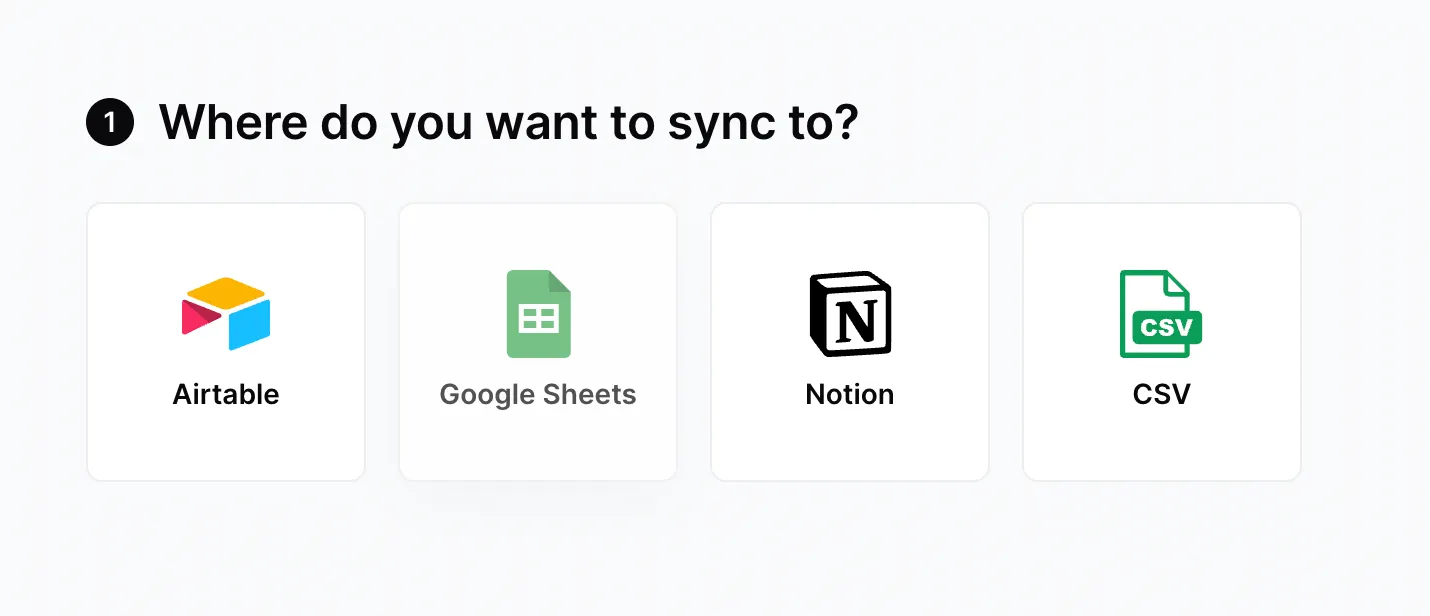
3. Create a new sync.
Select the Create New Sync button on your dataset page to define a new sync job.
4. Choose a destination.
Select Google Sheets as the destination.
5. Configure your sync settings.
Configure your sync settings by defining the destination spreadsheet and choosing how often it should be updated.

6. That’s it, you’re done! 🎉
Now the spreadsheet will automatically update with new data as often as you need it to, no manual downloads or scripting required.
Next Steps: Want to simplify the way you connect Snowflake to Google Sheets?
There are a few different ways you can connect Snowflake to Google Sheets, each with its own pros and cons.
Option #1, manually uploading a Snowflake CSV to your Google Sheet, doesn’t require much technical know-how and is a quick and easy solution for one-off uploads. Option #2, creating a Python script, enables auto-refreshing of the data inside your Sheet, but it’s a technical process that won’t be accessible to non-engineers.
Option #3, connecting Google Sheets to Snowflake via AirOps, gets you the best of both worlds. Creating a sync is straightforward, doesn’t require advanced skills, and your Snowflake data will automatically refresh inside of the Google Sheet at your chosen frequency.
If that sounds like something that would help you or your team spend less time fighting with data and more time generating actionable, data-driven insights, get in touch with AirOps today!
Scale your most ambitious SEO strategies
Use AI-powered workflows to turn your boldest content strategies into remarkable growth
Get the latest on AI content & marketing

Get the latest in growth and AI workflows delivered to your inbox each week


.webp)
